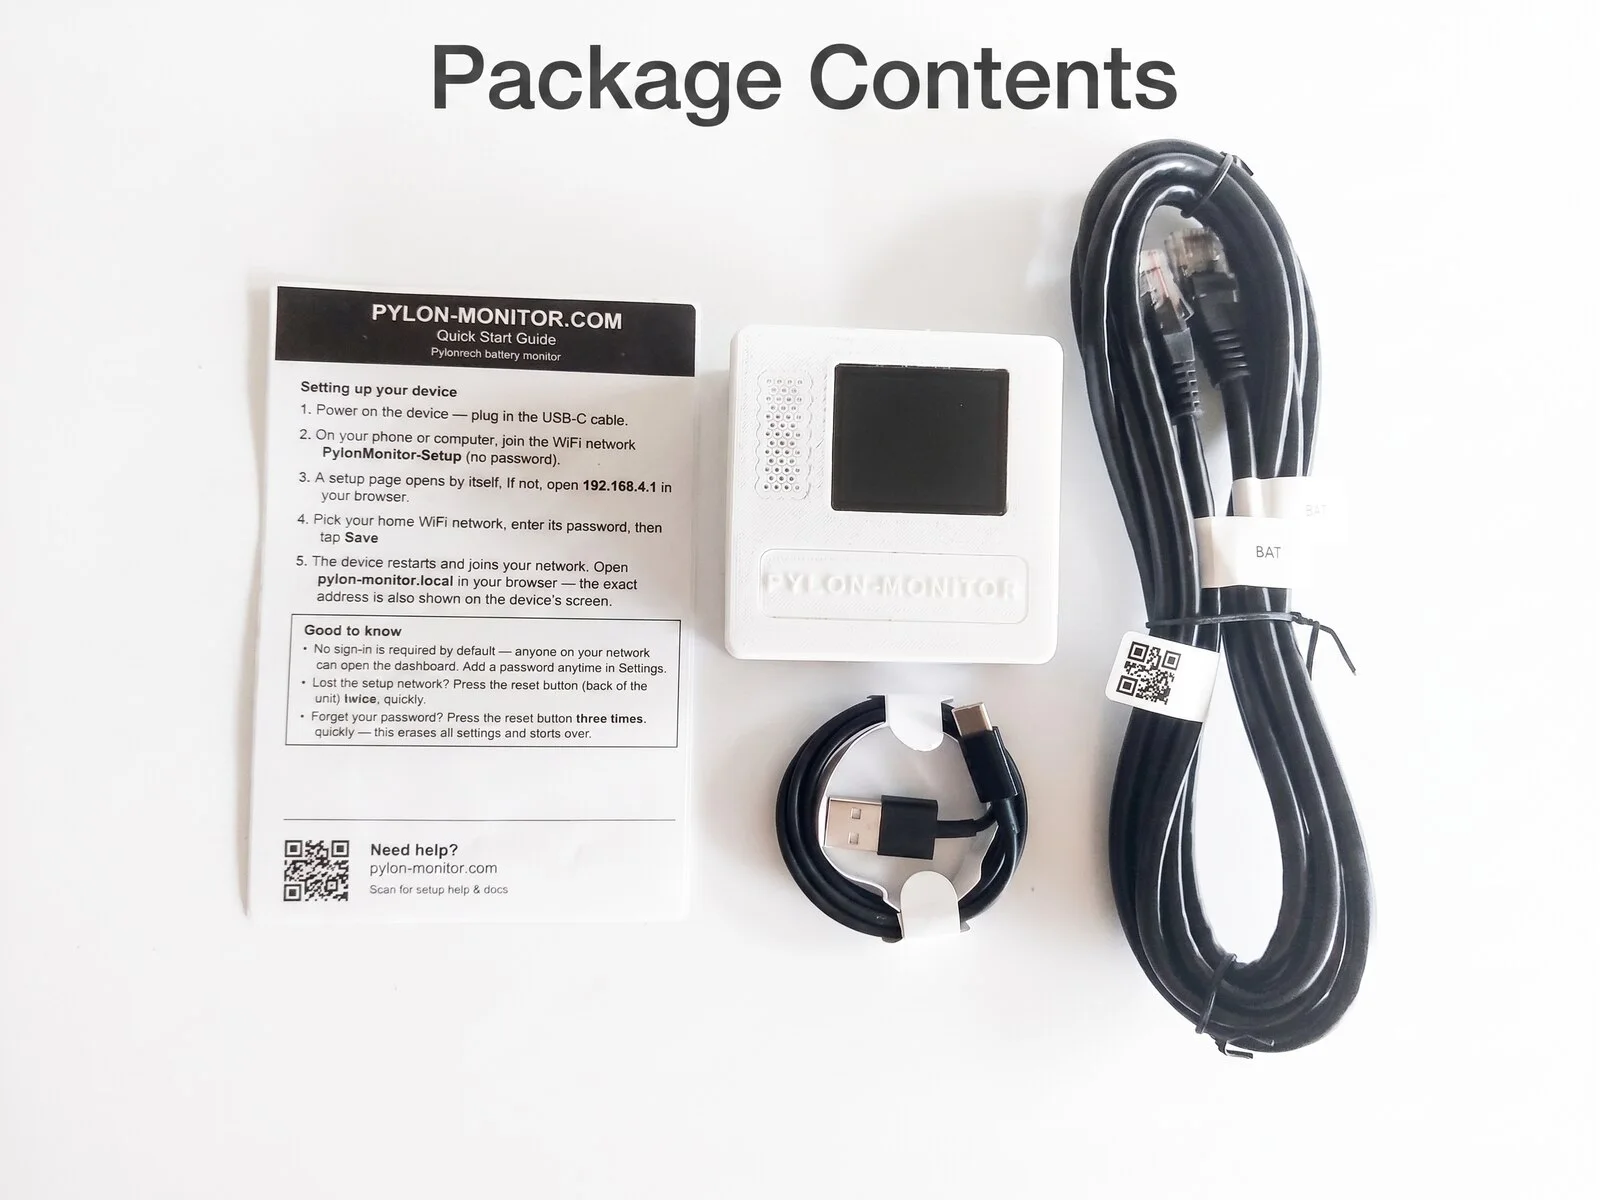
What's in the box
- Pylon-Monitor device (1.8" IPS TFT display) — 79 g
- RJ45 console cable + USB-A to USB-C power cable — 14 g combined
- This Quick Start card
Net weight ~93 g · Shipping weight (incl. packaging) ~123 g
5 steps to a live dashboard
-
Plug into the battery
RJ45 cable into the Console port of the master Pylontech battery (top of the stack), other end into the Pylon-Monitor.
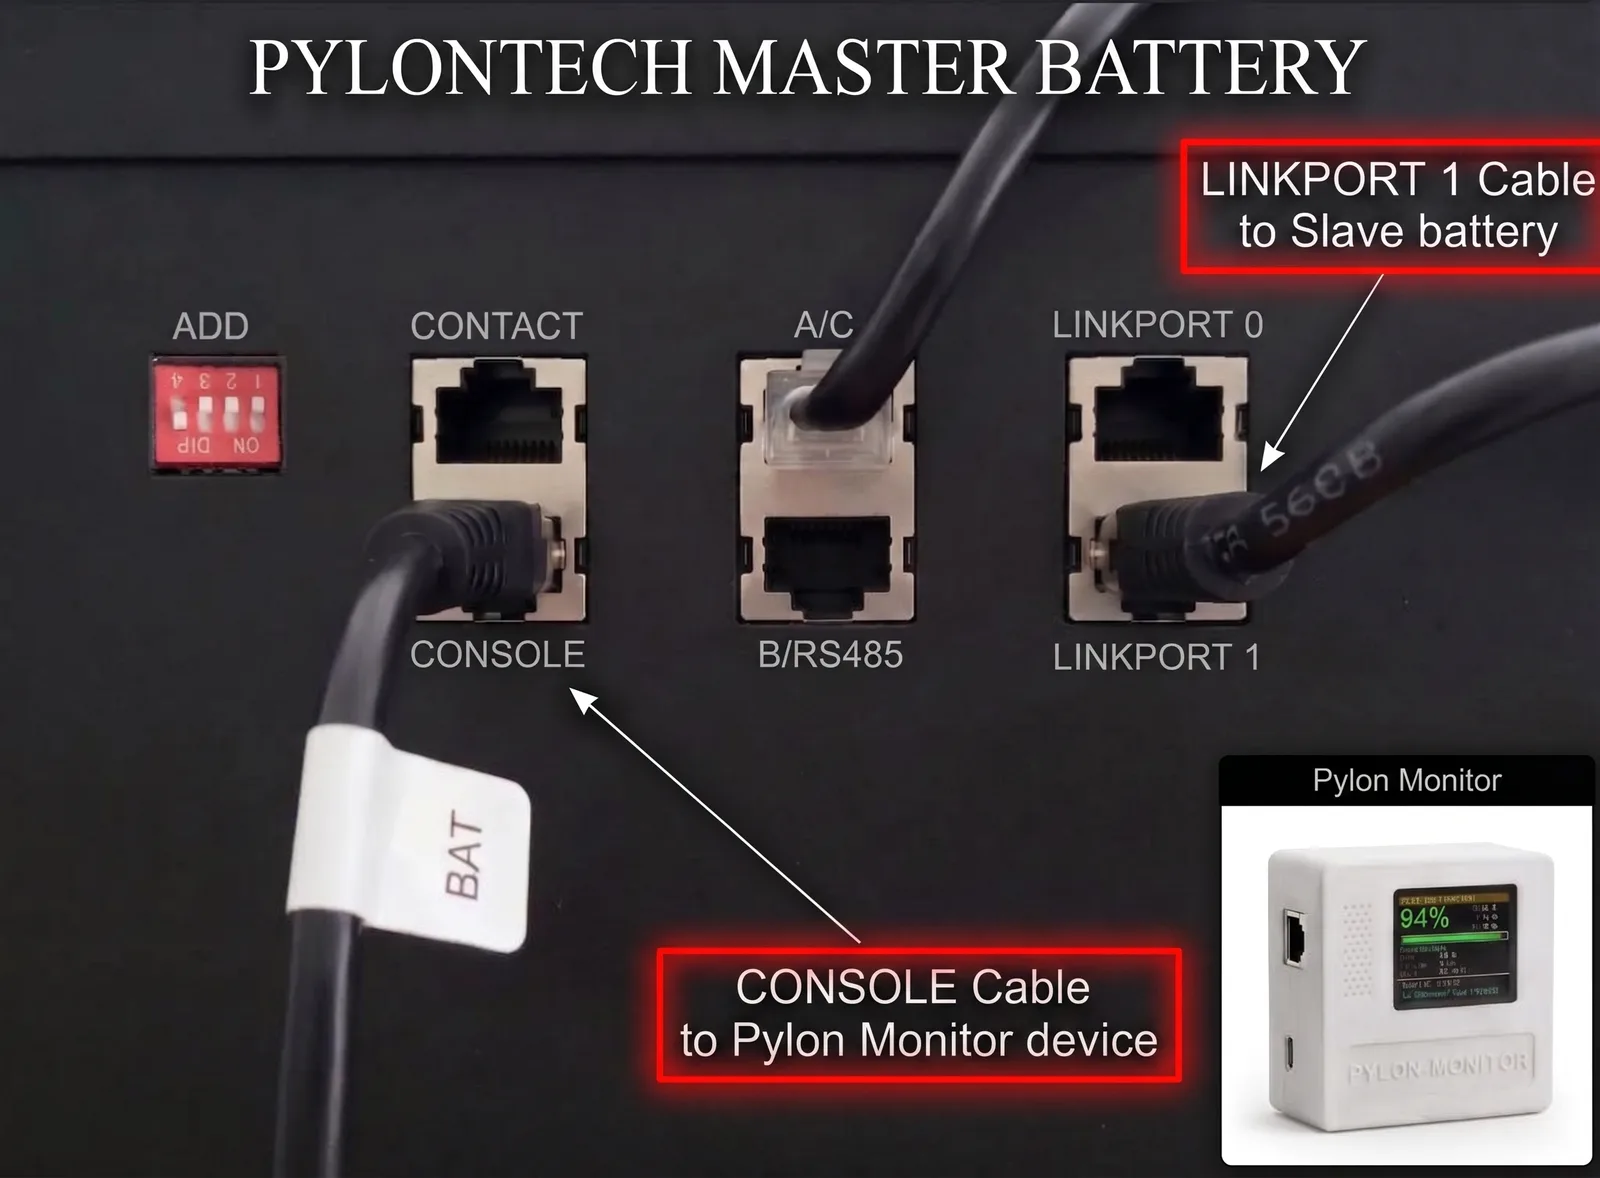
On the master battery: CONSOLE goes to the Pylon-Monitor, LINK PORT 1 goes to the slave battery. The mistake almost everyone makes: LINK PORT 1, not LINK PORT 0
The cable that chains your master battery to the first slave must leave LINK PORT 1 on the master — never LINK PORT 0. It plugs into LINK PORT 0 on the slave, and every further battery repeats the same 1 → 0 pattern. Wired the other way round the master never sees the rest of the stack, so Pylon-Monitor reports a single battery no matter how many you own. -
Power it on
USB-C to any 5 V source. The TFT screen lights up within a second or two and shows Starting up… Please wait…
-
Join the setup network
On your phone, connect to the WiFi network called
PylonMonitor-Setup. A setup page opens automatically. -
Pick your home WiFi
Select your network, type the password, hit
Save and connect. The device reboots and joins your WiFi. -
Open the dashboard
The TFT shows the IP address assigned by your router in its footer (e.g. on the
192.168.x.xor10.x.x.xrange). Type it in your browser, or tryhttp://pylon-monitor.localif your network supports mDNS.
That's it. You're live.
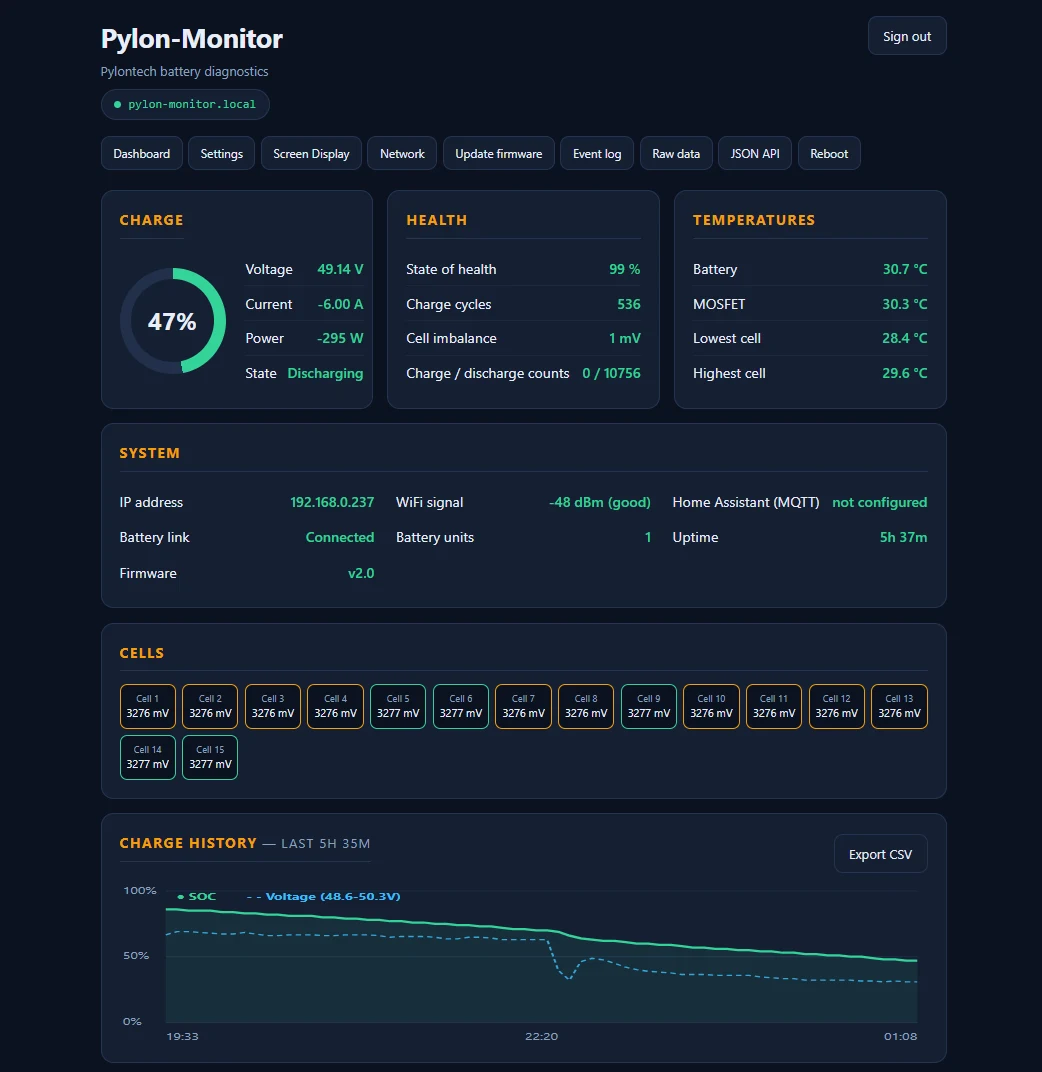
You'll see State of Charge, voltage, current, power, SOH, cycles, WiFi signal and temperatures — refreshed every few seconds. Same view on phone and PC.
First-login tips
- No login screen by default — the dashboard opens directly. Want one? Enable it (and set your own username/password) in Settings.
- The hostname is already
pylon-monitorby default, sohttp://pylon-monitor.localworks out of the box — change it in Settings only if you have more than one device. - Reserve the IP in your router DHCP, or set a Static IP in Settings.
- Bookmark the dashboard on your phone's home screen.
- For Home Assistant: pick MQTT (auto-discovery, zero YAML) or REST (a short YAML paste, auto-generated by the device).
- Firmware updates: the Update firmware button in the dashboard — download the
.binfor free and upload it yourself.
Trouble?
TFT screen stays blank
Check the USB cable and try another 5 V source.
"No battery data"
Wrong RJ45 socket — use Console, not RS485 / CAN / Link.
Only one battery out of several
The stack link cable must run from LINK PORT 1 on the master to LINK PORT 0 on the slave — not from LINK PORT 0.
No setup network visible
2 quick taps in a row on the reset button (on the back of the enclosure) to reopen the portal — nothing is erased, it's just temporary for this session.
.local doesn't open
mDNS is disabled on your network — use the IP shown on the TFT screen.
Forgot / changed your WiFi
2 quick taps in a row on the reset button (on the back of the enclosure) to reopen the portal and pick a network again — your other settings (MQTT, alarms, sign-in) stay intact. For a full wipe, use Factory Reset in the dashboard.
Anything else
Full guide on the Installation page, or check the FAQ.
Need more detail?
The full step-by-step guide covers the TFT screen, troubleshooting and factory reset.
Open the full Installation guide Take the visual Tour