Two ways in, both already built into the firmware
Ask ten people how they'd connect a Pylontech battery to Home Assistant and you'll get ten different half-answers involving custom components, HACS repositories, or YAML someone copy-pasted from a forum three years ago. With Pylon-Monitor there's no guessing: the device ships with two integration paths built directly into the firmware, and neither one requires installing anything on the Home Assistant side.
Both read from the same underlying data — the battery's Console port — so the choice isn't about capability, it's about what you already have running.
Option 1 — MQTT auto-discovery, the fast path
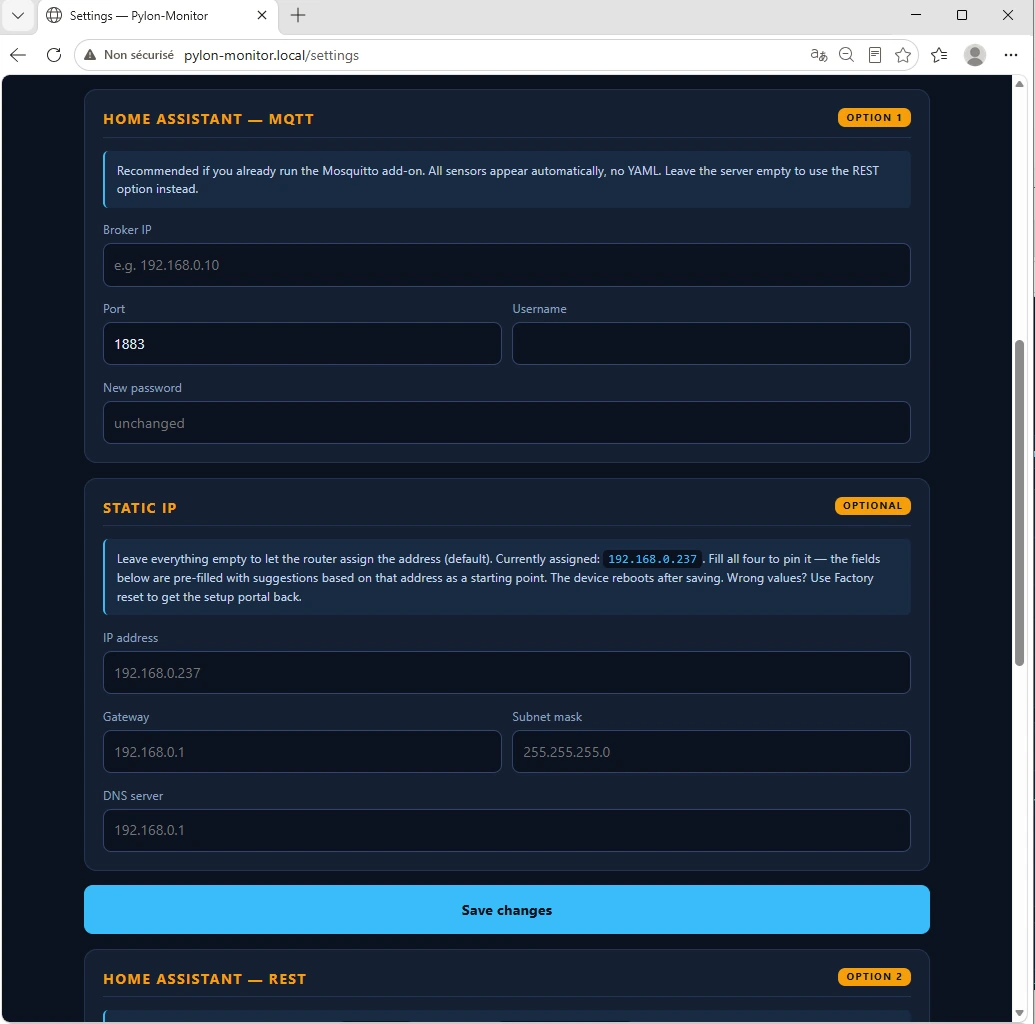
If Home Assistant already has the Mosquitto broker add-on running (most installations do), this is the option to use. Enter the broker's IP, port, username and password on the device's Settings page, save, and within about five seconds eleven sensors show up automatically under Settings → Devices & Services → MQTT — grouped into a single device card called Pylon-Monitor. No YAML, no restart, no manually defined entities.
The eleven sensors: SOC, SOH, voltage, current, power, battery temperature, MOSFET temperature, charge cycles, battery state, cell imbalance and battery count. Plus one extra signal that matters more than people expect: an availability topic backed by a proper MQTT Last-Will-and-Testament, so every sensor correctly greys out in Home Assistant the moment the device loses power or WiFi — instead of silently freezing on its last known value, which is the failure mode that actually burns people (an alarm that never fires because the "last known SOC" looked fine).
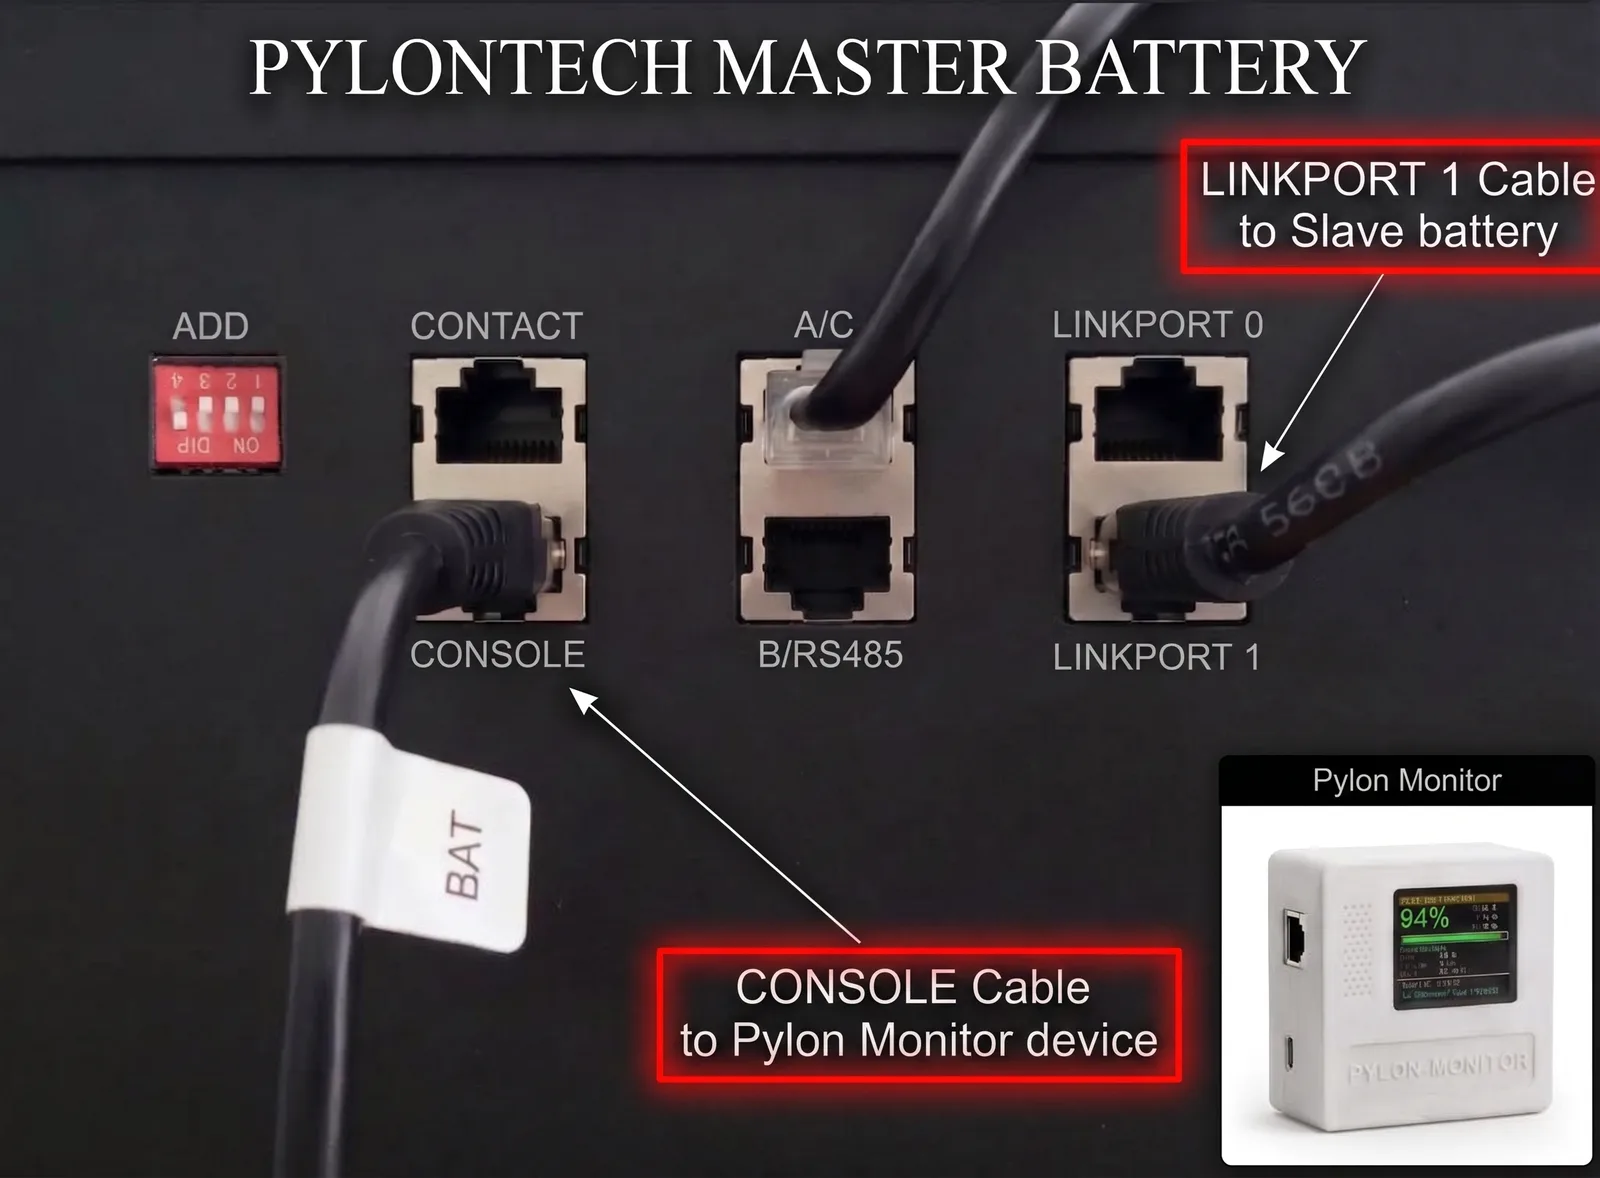
The cable that chains your master battery to the first slave must leave LINK PORT 1 on the master — never LINK PORT 0. It plugs into LINK PORT 0 on the slave, and every further battery repeats the same 1 → 0 pattern. Wired the other way round the master never sees the rest of the stack, so Pylon-Monitor reports a single battery no matter how many you own.
Option 2 — REST, if you don't run MQTT
No broker, no problem. Home Assistant's built-in rest platform can poll the device's /api.json endpoint directly every 30 seconds and create six sensors — SOC, SOH, voltage, current, power and state. The YAML block isn't something you have to write from scratch: the device's own Settings page generates it for you, with your current IP already filled in. Copy, paste into configuration.yaml, restart Home Assistant.
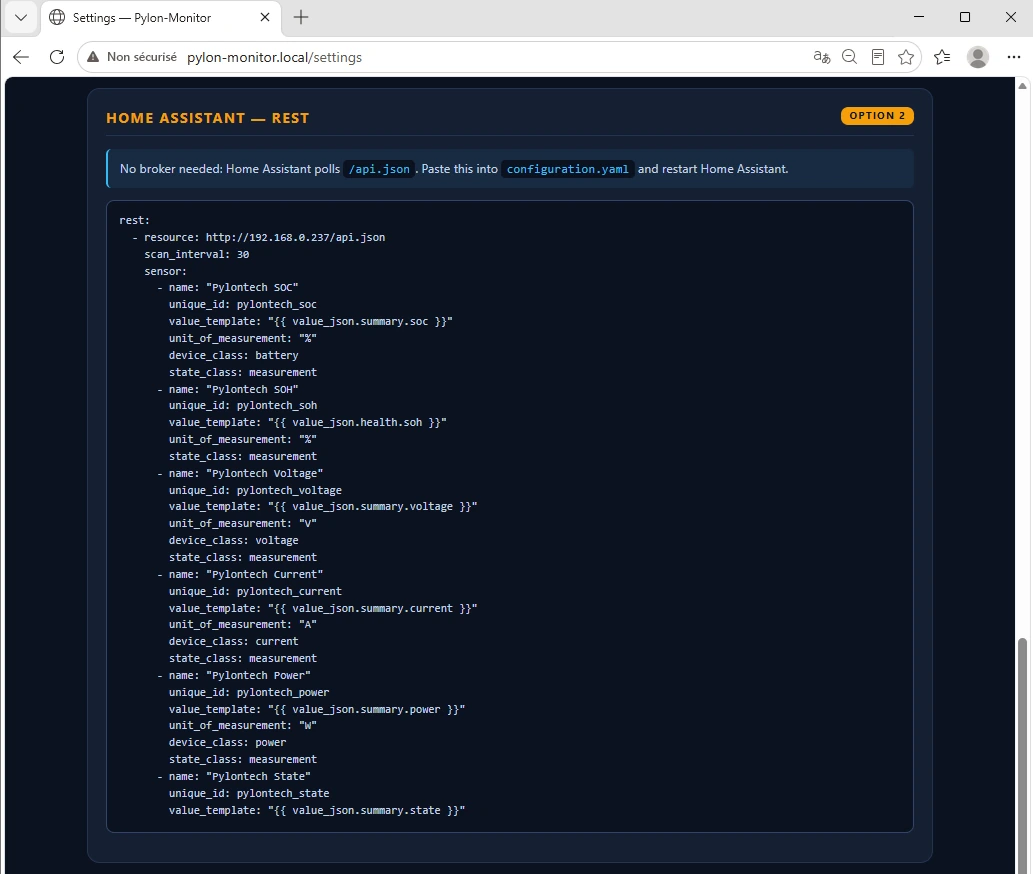
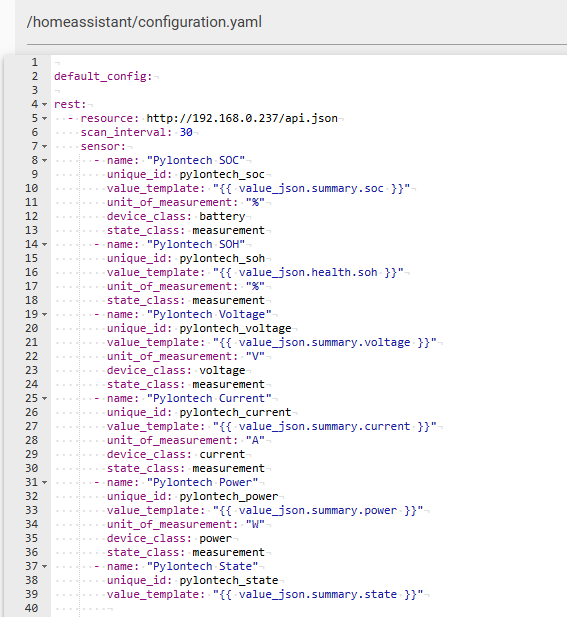
configuration.yaml — the exact block from the Settings page, no edits needed.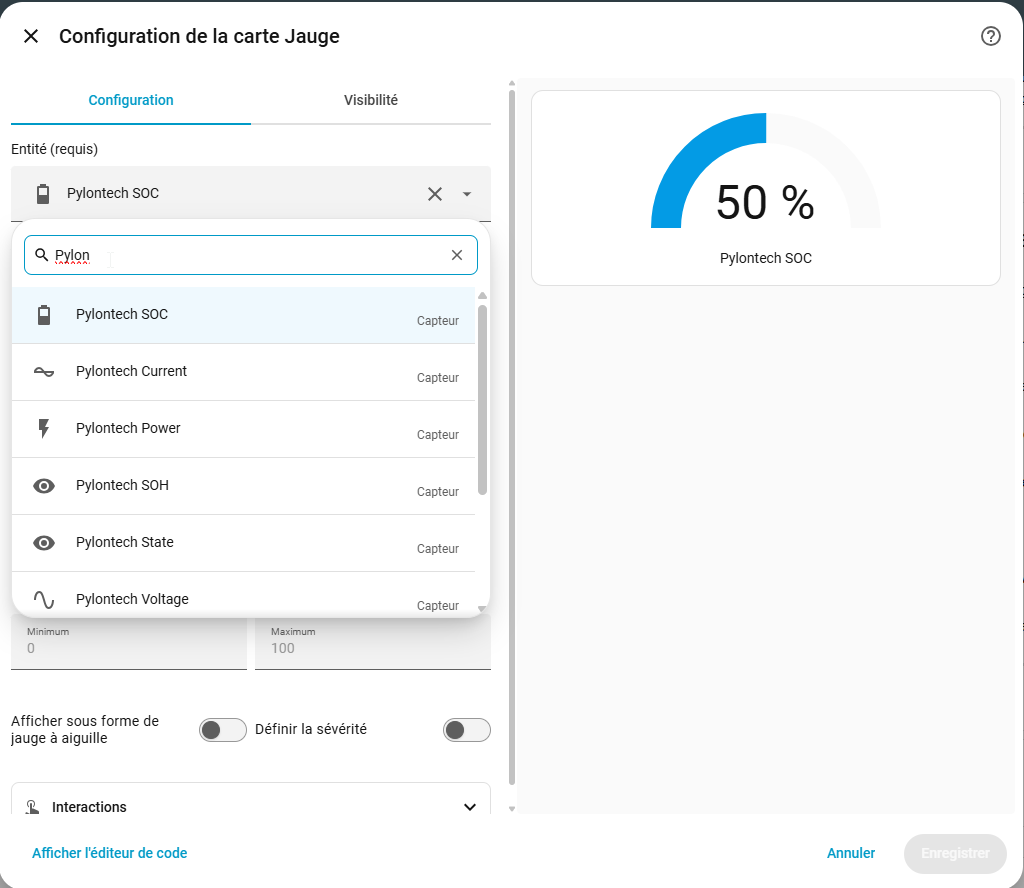
Which one should you actually pick?
- Already running a Mosquitto broker? Use MQTT auto-discovery. It's faster to set up, gives you more sensors, and the availability signal alone is worth it.
- No broker, don't want to install one just for this? REST works fine. Ten extra seconds of polling latency versus MQTT's near-instant push won't matter for battery telemetry — it doesn't change fast.
- Running a large HA instance with dozens of MQTT devices already? One more device on the broker is free. Go MQTT.
What to actually do with the sensors
Ten (or six) new sensors on their own are just numbers on a card. A few automation ideas that turn them into something useful:
- Low-SOC notification. A simple automation triggered on the SOC sensor dropping below a threshold — push notification via the Home Assistant app, no need for the device's own Pushover alarm if you'd rather centralize alerting in HA.
- Cell-imbalance watch. Cell imbalance rarely spikes suddenly, but a slow upward trend over weeks is exactly the kind of thing a Home Assistant history graph catches that a one-off glance at the TFT screen won't.
- Dashboard card next to your solar/inverter data. If you already track production and consumption in Home Assistant, dropping the Pylontech SOC and power sensors onto the same dashboard finally gives you the full picture in one place, instead of switching between apps.
For a deeper read on what these numbers mean and which ones deserve an actual alarm (versus which are just background noise), see Pylontech Diagnostics 101.
Quick troubleshooting
- MQTT line stays red / not connecting: double-check broker IP and credentials — a dedicated MQTT user (see tip above) is the most common fix when a reused HA login unexpectedly fails.
- Duplicate entities: you've got both MQTT and REST configured for the same values — remove one.
- Sensor shows "unavailable": if this happens exactly when the device loses WiFi or power, that's the availability signal working as intended, not a bug.
Don't use Home Assistant?
Everything above rides on the same /api.json endpoint and MQTT topics that power Jeedom, Node-RED, Domoticz and openHAB integrations too — see every other way to connect a Pylontech battery to a smart home platform if Home Assistant isn't your stack.
Tuya / SmartLife — an unofficial bridge via IFTTT, Make.com or Apilio
Tuya devices and the SmartLife app only ever report to Tuya's own cloud — there's no generic JSON endpoint on their side the way there is here, and no official Pylontech-to-Tuya integration exists. This device doesn't pretend to be one either. What it does provide is the missing piece for a no-code bridge: turn on Settings > Public JSON access > "Enable a real public URL" and pylon-monitor.com republishes your device's JSON at a stable HTTPS link, reachable from anywhere — no port forwarding, no VPN, nothing exposed on your own router.
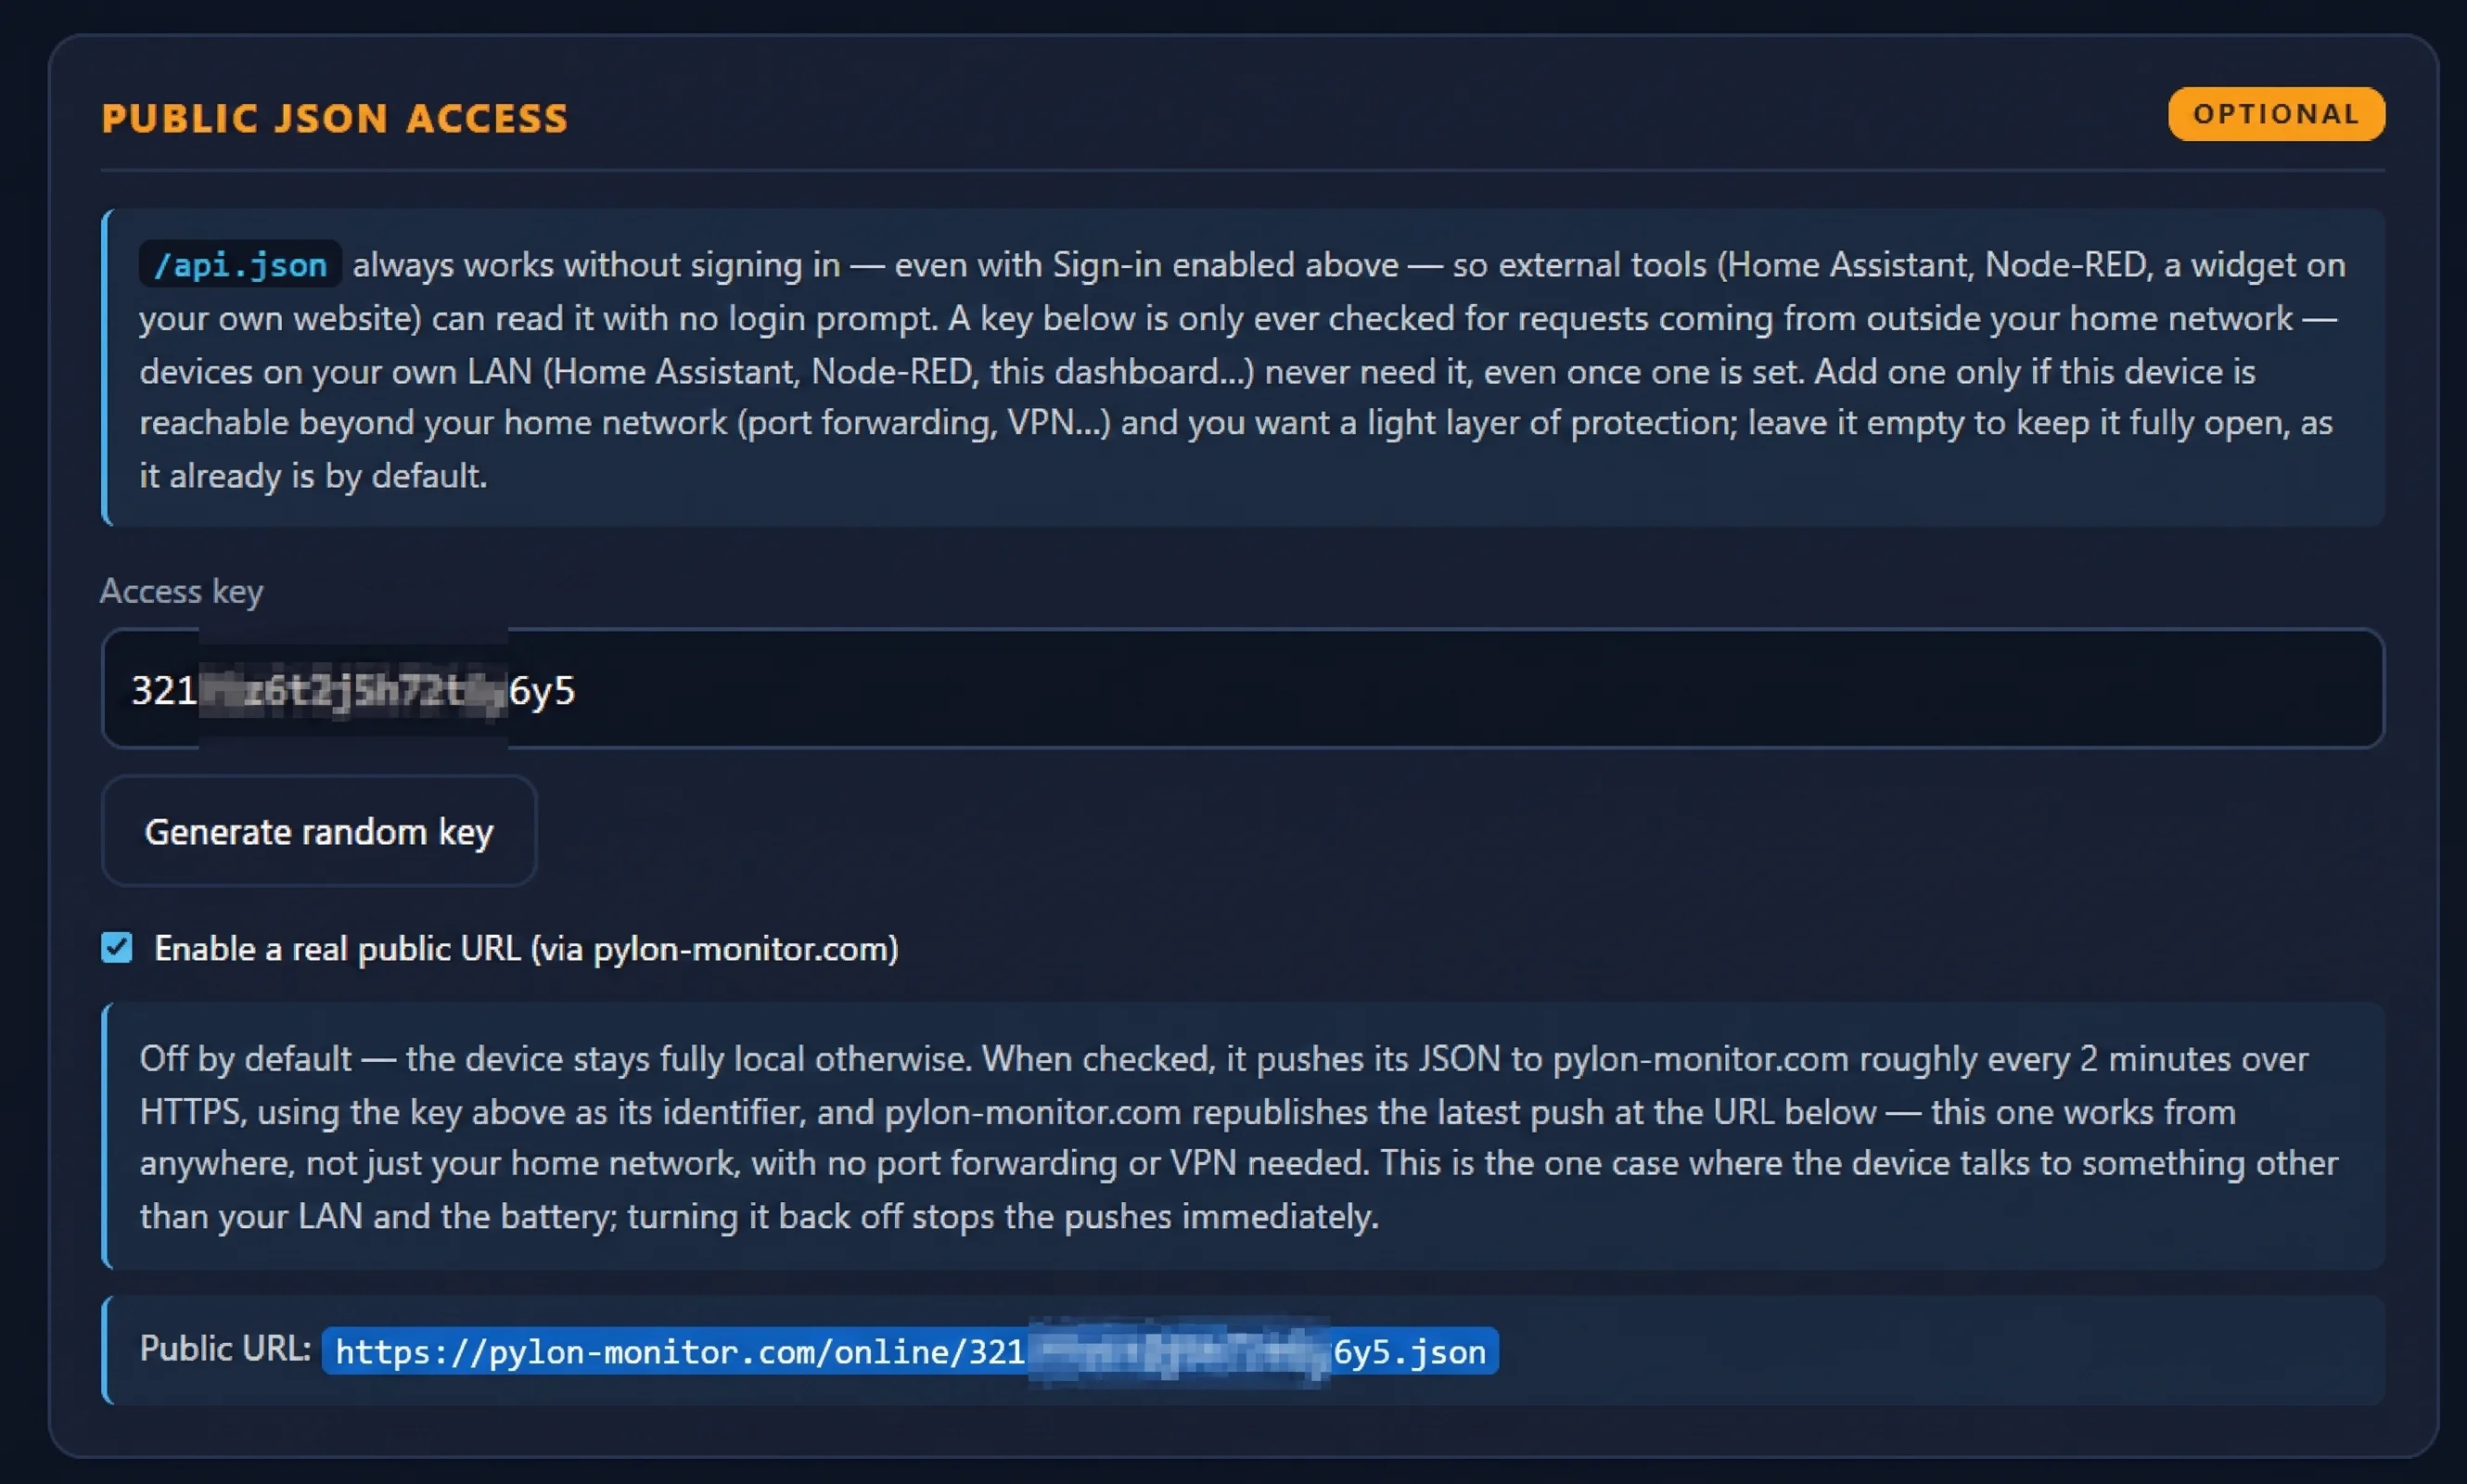
With that URL in hand, a free-tier no-code automation platform can poll it and push the values into a Tuya virtual device or a SmartLife-facing webhook:
- IFTTT — a Webhooks/JSON applet polling the URL on a schedule, feeding a SmartLife action.
- Make.com (formerly Integromat) — an HTTP module reading the URL, a JSON parser, then a Tuya/SmartLife module or a webhook back into Tuya's IoT Platform.
- Apilio — built specifically around Tuya/SmartLife automations, with its own HTTP-request trigger that can poll a URL like this one directly.
None of this is officially supported by Tuya or by Pylon-Monitor — it's a bridge you assemble yourself from existing free tools, not a certified integration. But if you want your battery's SOC or state on a SmartLife dashboard, or in an Alexa/Google routine that only understands Tuya devices, the public URL above is the one piece you'd otherwise be missing.
Frequently asked questions
- Do I need an MQTT broker to use Pylontech in Home Assistant?
- No. If you don't run an MQTT broker, Home Assistant's built-in REST platform can poll the device's JSON API directly and create six sensors — no broker required.
- How many sensors does Pylontech monitoring give me in Home Assistant?
- MQTT auto-discovery creates 11 sensors plus an availability signal. The REST platform creates 6 sensors from the same underlying data. If your pack has more than one Pylontech battery, MQTT also publishes 5 sensors per battery (SOC, SOH, cycles, voltage, state), and the JSON API always exposes a full per-battery breakdown regardless of which integration you use.
- Can I use both MQTT and REST at the same time?
- You can, but you shouldn't for the same values — it creates duplicate entities. Pick MQTT if you have a broker (it covers everything REST does and more); use REST only if you don't.
Pylon-Monitor ships with both integrations built in — MQTT auto-discovery and the REST YAML generator are already on the device, ready the moment you plug it in.
Order now — €59 One-time purchase, €59 total — no VAT, no subscription.